


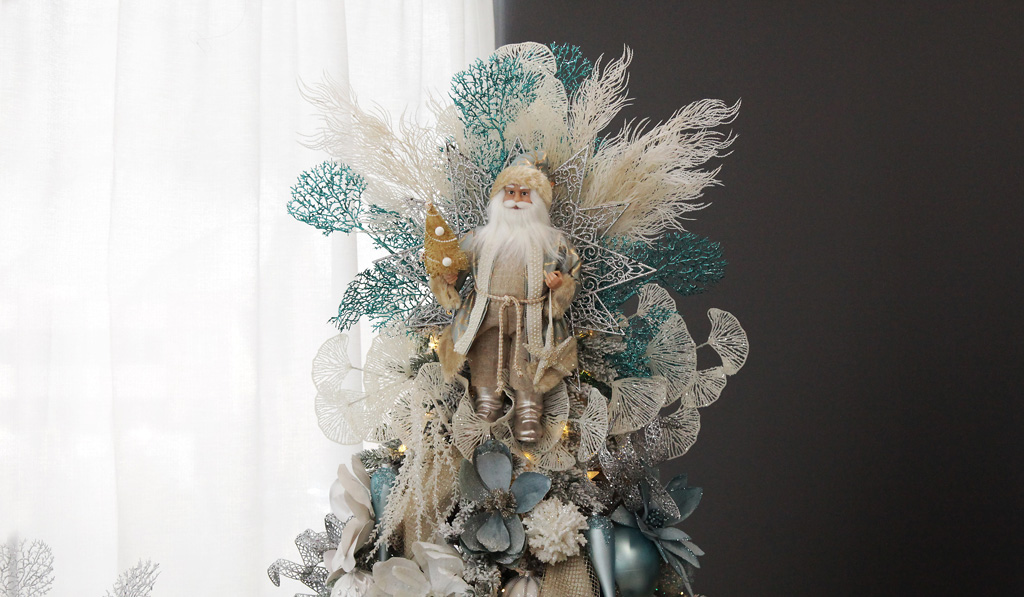
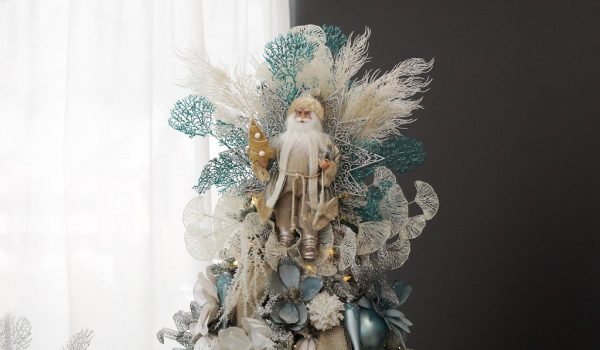
See how we used a seaside themed Santa ornament as the feature and embellished with plenty of glittery coral inspired sprays to create a divine Coastal Chic Christmas DIY Tree Topper.
One of our favourite ways to really elevate our tree decorating, is with a stunning tree topper.
Of course, there are many traditional, ready-made tree toppers such as angels and stars, that look amazing a-top a tree and require little-to-no effort to put in place. But with just a little extra effort, a DIY custom-made tree topper can really be the cherry on top.
A big beautiful tree that is meticulously adorned with plenty of decorations, deserves a lavish tree topper to balance and complete the look. And creating your own tree topper is also a great way to ensure that every part of your tree is perfectly coordinated when it comes to consistent colour and style.
For a Coastal Chic Christmas decorating style for example, get creative and match your tree and other coastal themed Christmas decorating in the space, using a seaside Santa and coral sprays. We’ve subtly incorporated a star too.
Lavish and perfectly co-ordinated doesn’t have to be complex though. This amazing DIY topper requires only a few key pieces and just a few steps to put it all together.
Here’s everything that you need to know to create your own Coastal Chic Christmas DIY Tree Topper.

We’ve used:
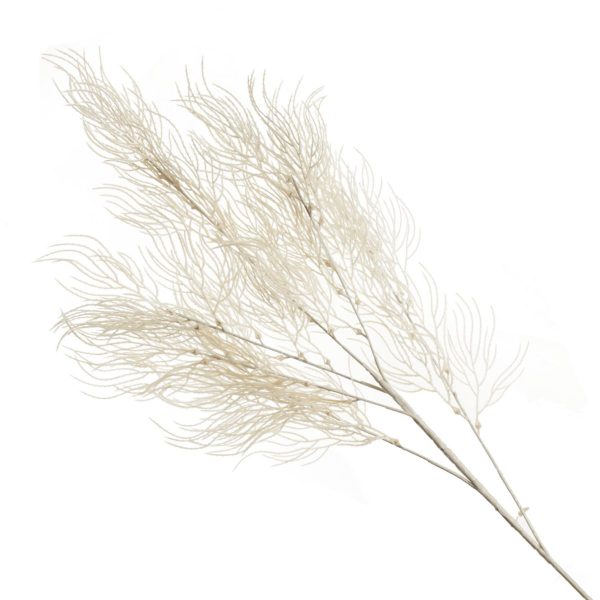
- White Feathery Coral Spray – approx 2 – 3
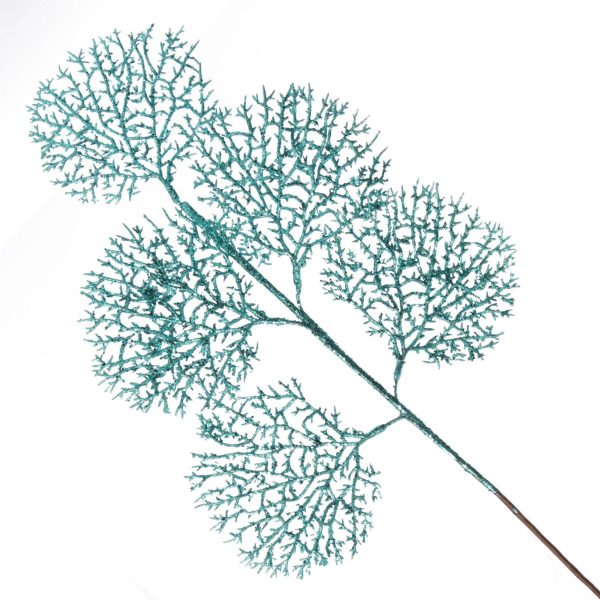
- Aqua Blue Coastal Coral Pick – approx 3
- White Glitter Fan Coral Pick – approx 3
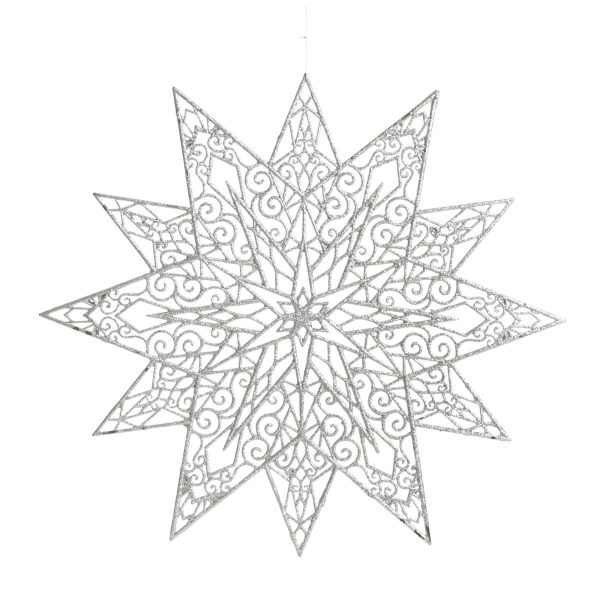
- 1 x Silver Glitter Hanging Christmas Star
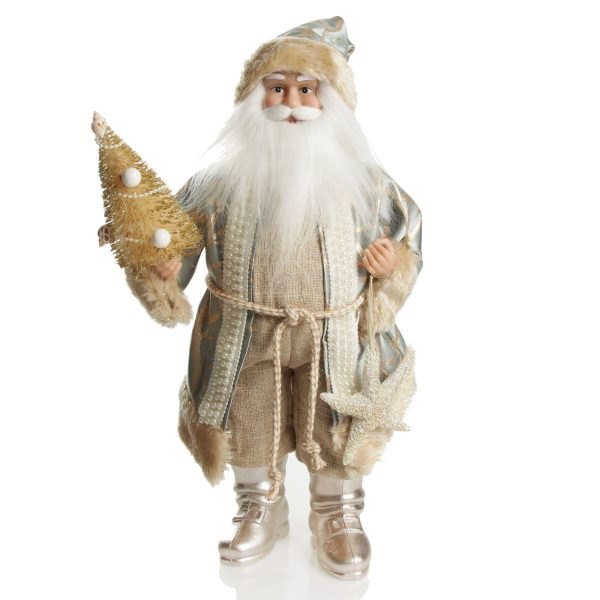
- 1 x Natural Seaside Standing Santa Christmas Ornament
- Cable ties and/or pipe cleaners (in coordinating colour/s to keep them as “hidden” as possible)
Tree Topper Tips
You can use the above indicative shopping list, and below process, to make a tree topper to suit any decorating theme – simply choose sprays and feature pieces to coordinate with your chosen style.
Sometimes when we do a DIY tree topper, we deconstruct a selection of sprays and use a block of florist’s foam to position the various elements and create the topper. This can also make it easier to attach the topper to the tree.
For this Coastal Chic Christmas DIY Tree Topper, we opted to not use the florist foam and instead keep the individual sprays intact and simply push them into the top of the tree. This also means that at the end of the festive season, you can easily take your topper apart and re-use all the different pieces in a different way another time.
Build Your Coastal Chic Christmas DIY Tree Topper
- Affix the Star to the tree – use cable ties to secure the star to the top of the tree. Don’t put it too close to the very top, you need to have some strength from the tree to secure the star and the rest of your tree topper to. As a guide, you could align the very top branch of the tree with the top of star and then fix the middle of the star a little further down the trunk, almost nestled in the top branches.
- Arrange/position sprays and picks – with your selection of sprays and picks in front of you, consider the texture and height of the individual pieces. Think about which pieces are best to sit tall at the back, out to the sides, and towards the bottom as well as whether your tree be viewed from all sides, 180°/against a flat wall or in a corner.Note: Don’t choose too many different varieties of sprays. We have used 3 different spray designs and spread them evenly through the display.Push the sprays and picks into position behind the around the top of the tree, behind the star.We’ve put 1 of each of the Aqua Blue Coastal Coral Pick and White Glitter Fan Coral Pick to sit taller/at the back with the White Feathery Coral Sprays in front of those, at approximately the same height.
And then one each of the Aqua Blue Coastal Coral Pick and White Glitter Fan Coral Pick at a slightly lower level with one set to the left and the other to the right.
Once you have them all in place, style the individual pieces to create a full floral arrangement that extends in all directions around the star.
Both the main and individual stems for each spray are wired, which makes it super easy to style and position your pieces and have them stay in place! You can use some cable ties to keep things in place if needed. - Attach Santa – once you have the florals just right, attach the Santa ornament to the star and/or tree using cable ties or pipe cleaners around his waist. Try to find matching/complimenting colours for the cable ties/pipe cleaners so that they are as discreet as possible.
- Finishing touches – with your tree topper now in place, you may like to add extra sprays, florals and decorations around the top of the tree to fill the space between the top branches and the base of the tree topper. We do this so that there is a seamless transition between the tree and the topper.
And that’s how you create an amazing Coastal Chic Christmas DIY tree topper.
If you love all things Christmas craft, not just DIY tree toppers, make sure to check out our Christmas Craft blog for lots more Christmas Craft ideas.
Head to our Inspiration Gallery for more Coastal Chic Christmas decorating ideas and inspiration.
We absolutely love seeing how other people get crafty at Christmas time, so make sure you follow us on our Facebook and Instagram pages and be sure to share your Christmas craft adventures with us too.