


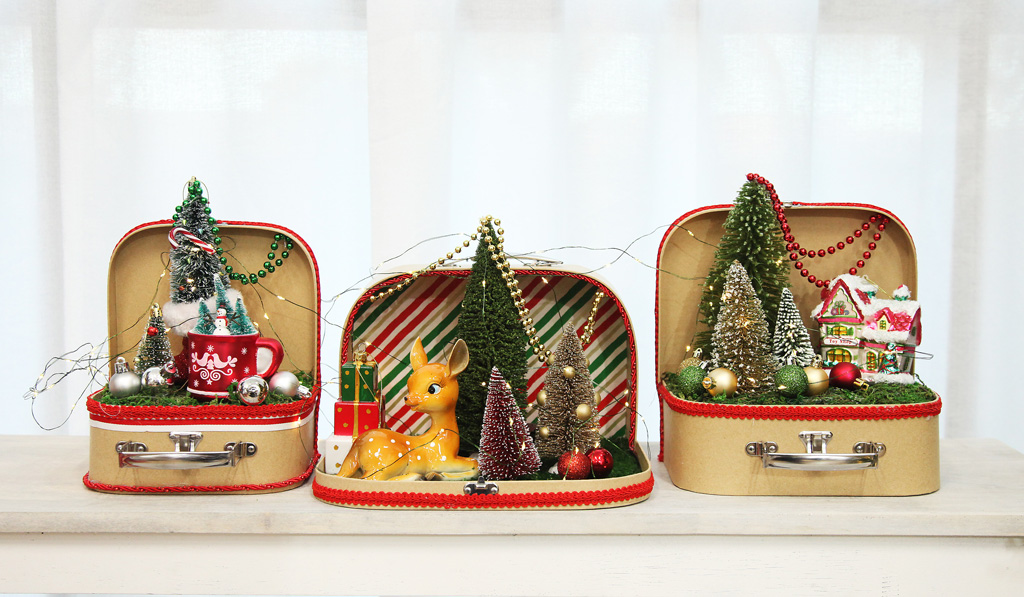
Let your creativity flow and have lots of fun crafting the cutest Vintage Christmas Suitcase Scenes.
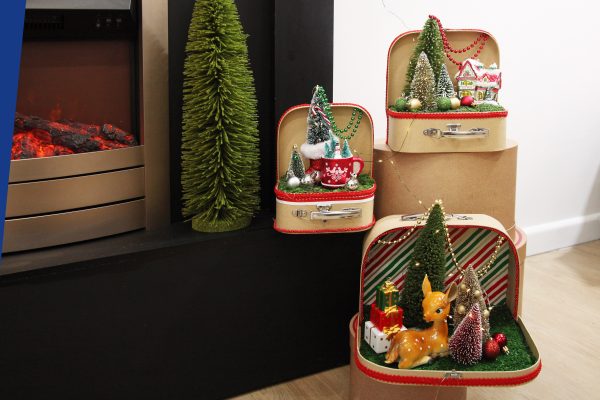
This is such a versatile project. Create as many or a little you like to suit your space (or spaces!) and it’s so simple to style with whichever mini decorations you choose. The hardest part is choosing which ones to use!
Let’s get started!
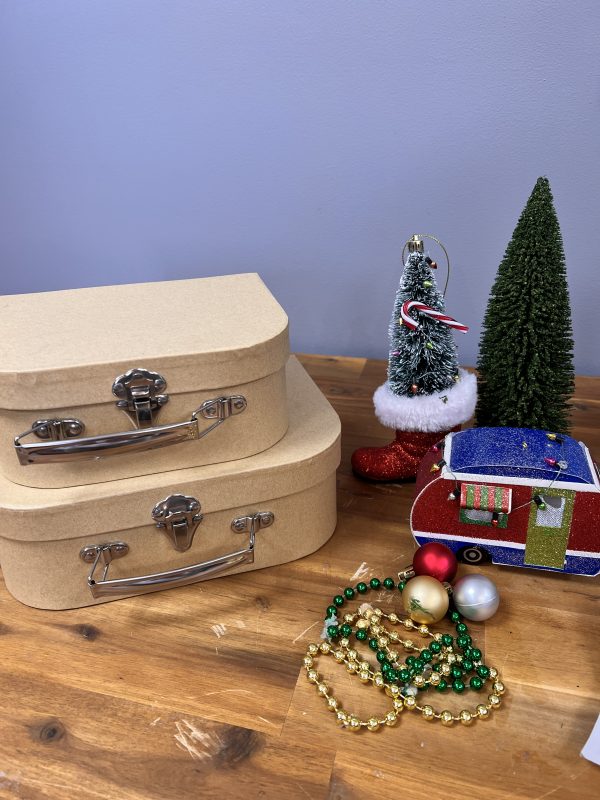
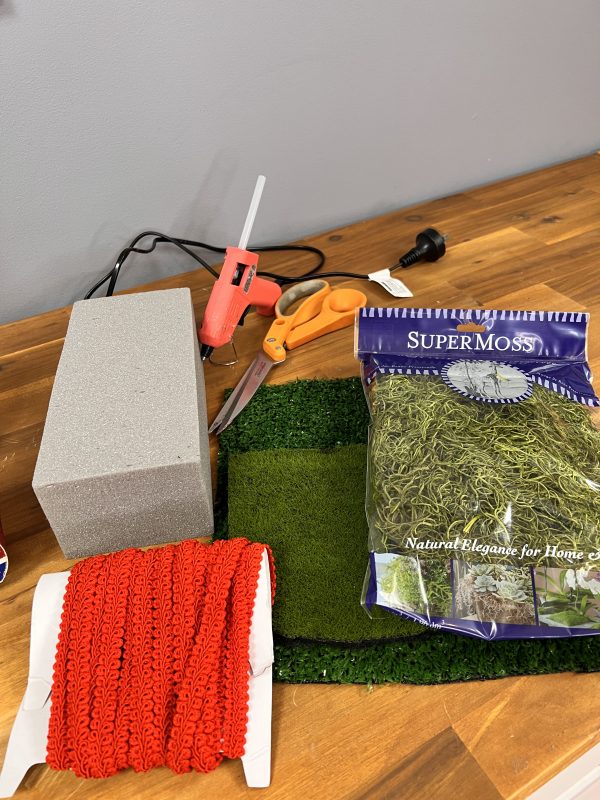
Materials You’ll Need for Your Vintage Christmas Suitcase Scenes
- Kraft suitcases
- Dry floral foam
- Artificial moss
- Coloured braiding
- Small ornaments &/or tree decorations
- Mini table top trees
- Other decorative pieces – bead chain garland, mini baubles, mini candy canes
- Hot glue gun
- Scissors
You can find the kraft suitcases and dry floral foam bricks, as well as lots of mini items to decorate with, in the Christmas Craft Supplies section of our website.
Of course, we have a huge selection of ornaments, tree decorations and table top trees too.
For everything Vintage Christmas themed, all in one place, you can go straight to the Vintage Christmas Collection page in our Inspiration Gallery.
Step 1: Cut Floral Foam to Fit Suitcase
Once you’ve gathered all of your supplies, the first thing that you need to do is to fill the space inside the bottom section of the suitcase. This will create your base or platform to decorate.
Depending on the size of the suitcase and size of foam bricks that you are working with, you might be able to fit one whole brick and then cut another to fill the remaining space, like we have done here.
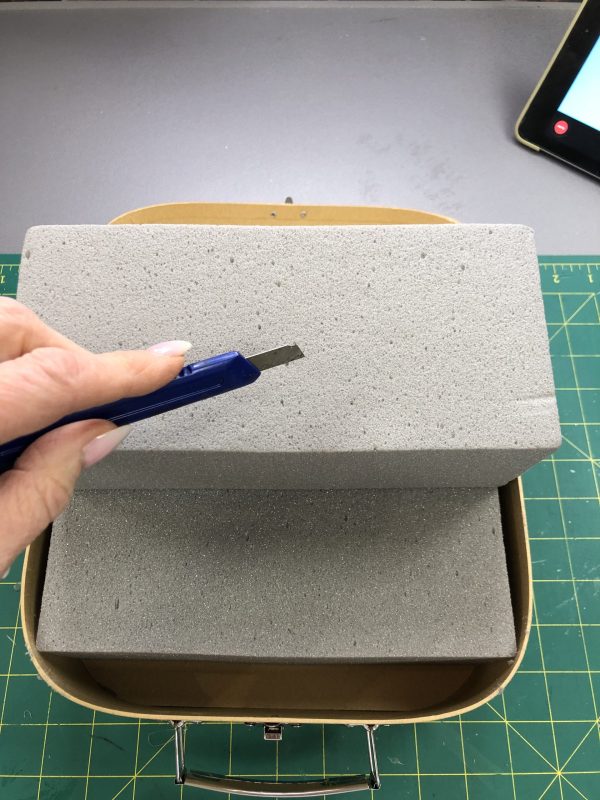
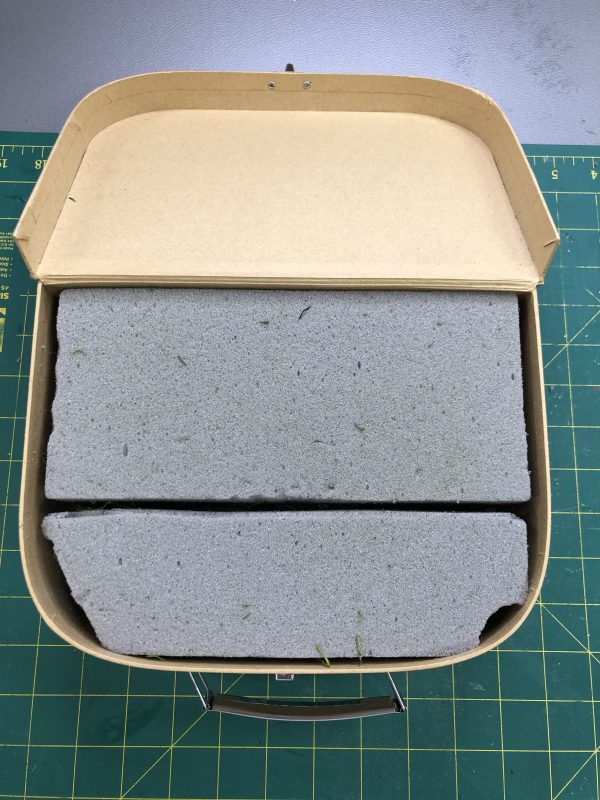
Ideally, you want to aim to have fewer larger pieces as opposed to lots of small pieces, to hopefully achieve a flatter surface. But it will work just as well either way.
Try to fill as much of the space as possible so that there are no big holes or gaps.
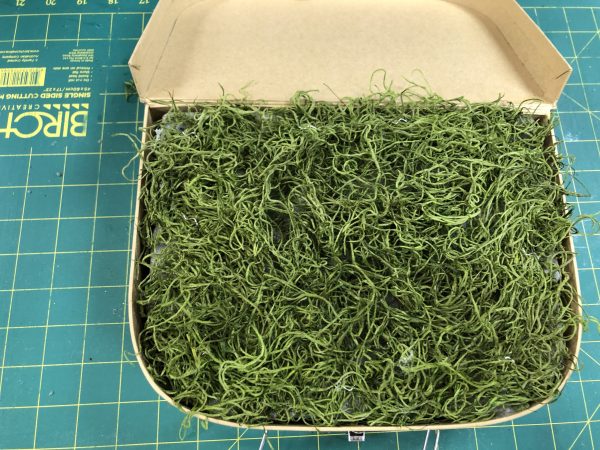
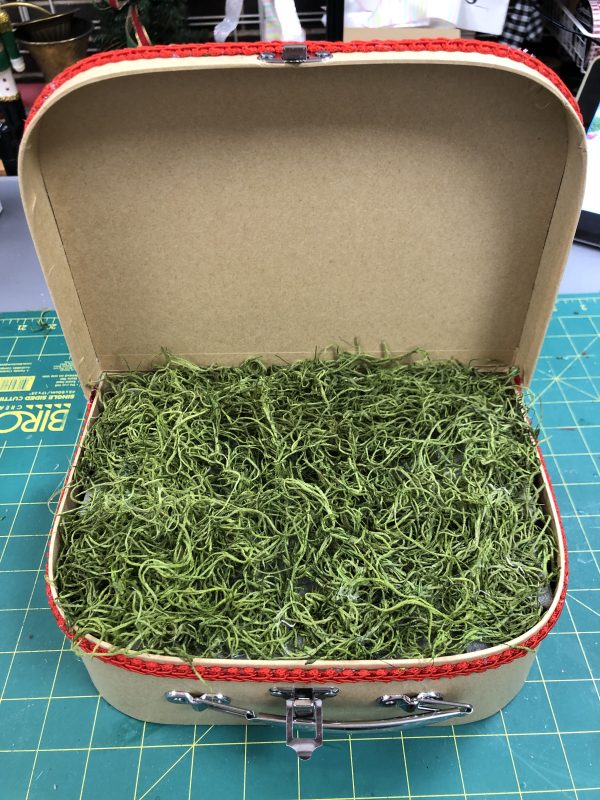
Step 2: Cover the Foam with Artificial Moss
Next, you’ll use artificial moss to cover the foam with “grass”.
You might use loose moss that you can pull and arrange into place, or sheets that you can cut to size.
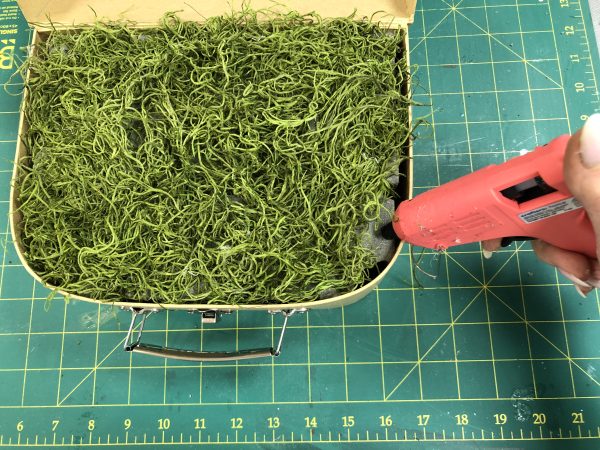
Once you have your moss in place, use your hot glue gun to secure it to the foam bricks below.
Step 3: Attach Coloured Braiding Around the Edges
We chose to use red coloured braiding, but of course you can use whichever colour (or colours!) you have on hand or that works best with your Vintage Christmas decorating colour scheme. You could do each in a different colour. Ribbon would work well for this too.
With the suitcase lid open at a 90 degree angle, use hot glue to attach the braiding from the bottom edge on one side, over the top and finishing at the bottom edge on the other side. Trim as required.
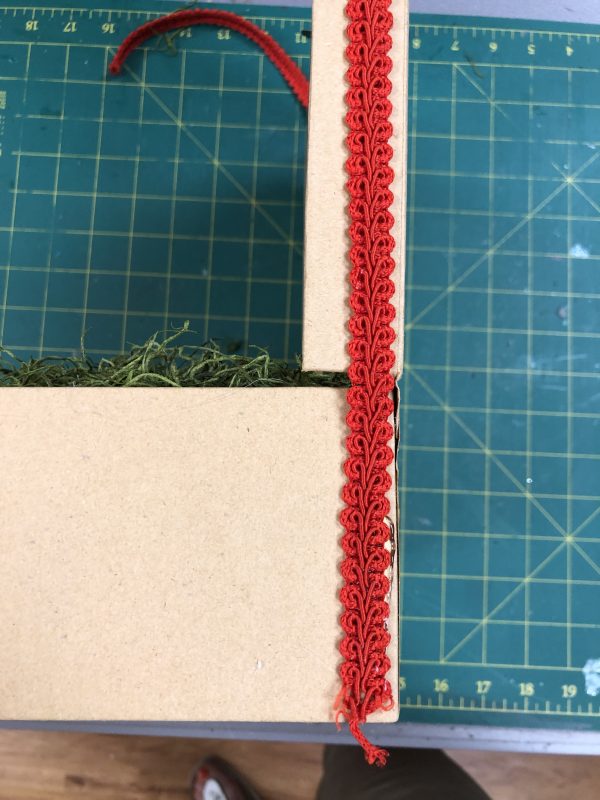
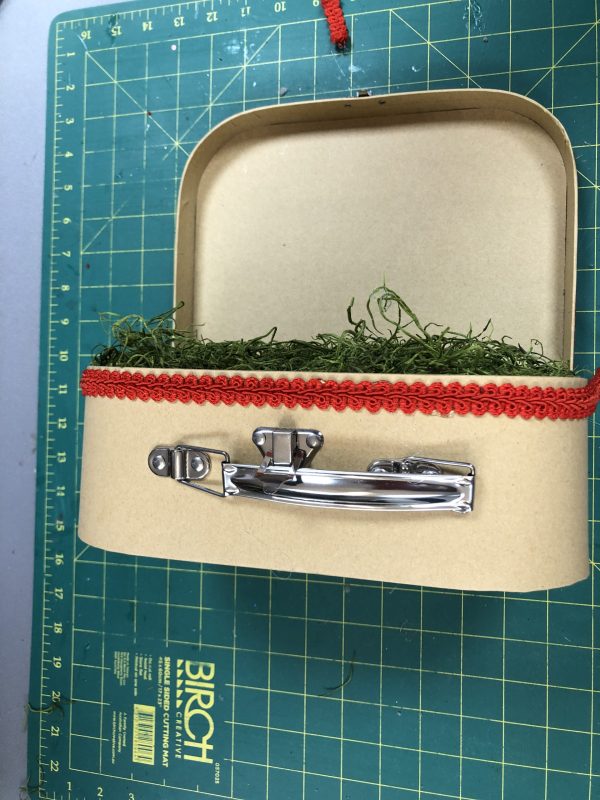
Do the same to attach another strip of braiding along the top edge of the main part of the suitcase.
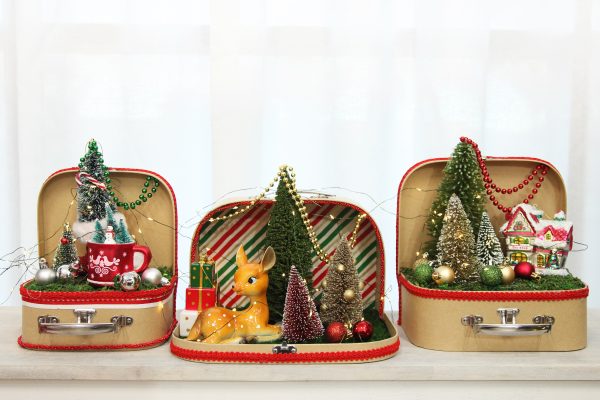
Step 4: Create Your Vintage Christmas Scenes
With your base now complete, it’s time for the fun part!
Arrange your selection of ornaments, tree decorations and mini table top trees to bring your Vintage Christmas Suitcase Scenes to life.
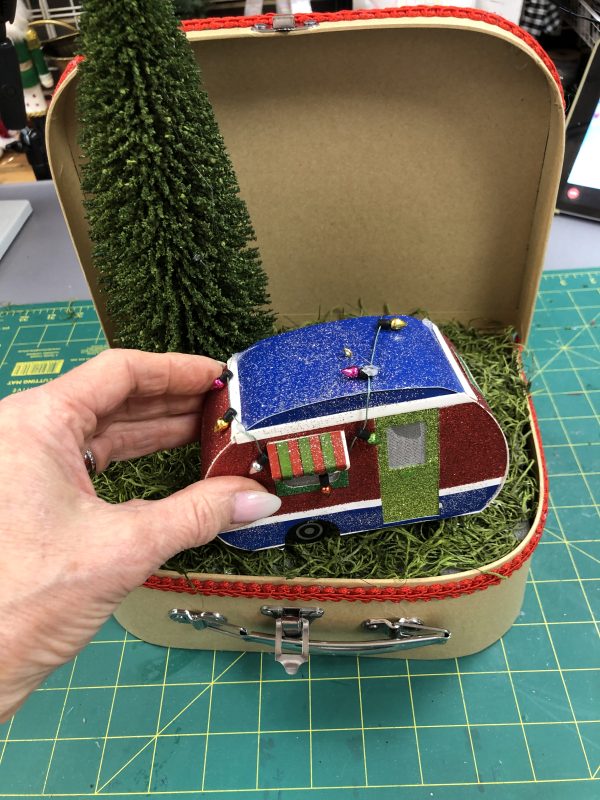
Where possible we opted to not secure (or use temporary solutions) so that we can have the option to re-use the items and re-create different scenes next time. But of course, if you love your scenes and want to make them a little more permanent you can get busy with your hot glue gun. We’d suggest putting everything in place first, to ensure that you’re completely happy, before you start gluing everything down.

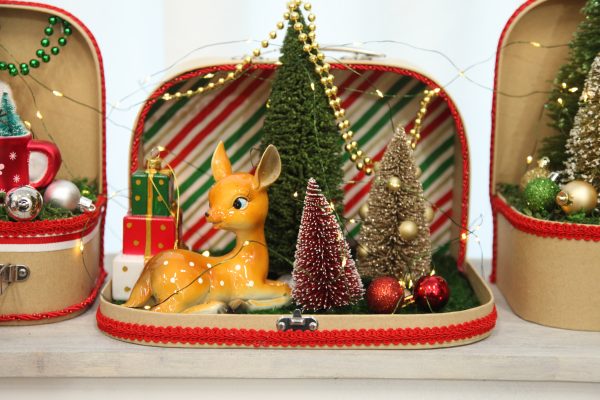
Once the main pieces are in place, add a little extra festive flair and twinkle with mini baubles, beaded garland or even fairy lights.
Then arrange in your specially chosen place for an instant Vintage Christmas vibe.
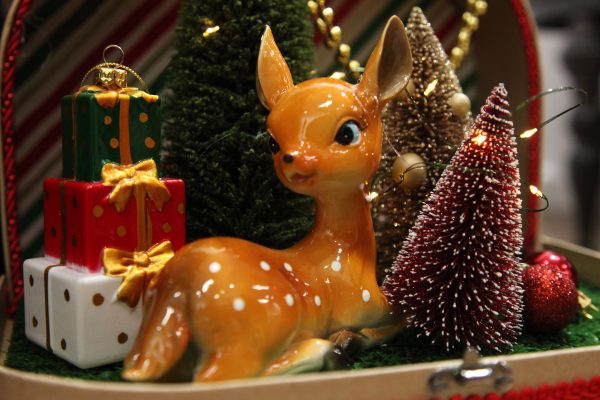
Variation Inspiration
As we have mentioned, there are endless options for how to style your Vintage Christmas Suitcase Scenes.
There is also another option for how to use the suitcase itself. You may have noticed in the images above that for some, we opted to flip the suitcase around the other way, building on the lid space instead. Using the suitcase in this way, gives us a deeper/longer space to work with by utilising the space right at the back/inside the base of the suitcase too.
We didn’t need to use any florist foam in this variation. We simply added the artificial moss directly to the base.
Another lovely idea to really add something special is to use wrapping paper the embellish the back wall of your Vintage Christmas Suitcase Scene. Make sure you do that before you start placing your ornaments and other decorative pieces!
And that’s everything you need to know and do to create your own retro inspired Vintage Christmas Suitcase Scenes.
If you love all things Christmas craft, make sure to check out our Christmas Craft blog for lots more Christmas Craft ideas.
And for many more decorating ideas and inspiration, head to our Inspiration Gallery to discover our complete range of decorating collections, including the warm and nostalgic Vintage Christmas Collection.
Get Social – Celebrate & Decorate with Us!
Be sure to connect with us via social media on our Facebook or Instagram pages, and of course keep an eye on our website too, to make sure you don’t miss out on all the fun Christmas things we get up to as we create, decorate and celebrate this most wonderful time of the year.
If you love Christmas decorating and crafting, we are sure that you will love our Celebration Central Community on Facebook. It’s a great place with very supportive and friendly members who share loads of celebrating and decorating ideas for all occasions, including Christmas of course! We host weekly Lives as well as give-aways and exclusive member only specials on our two online stores, thechristmascart.com.au and giftsandkeepsakes.com.au. We’d love to get to know you over there.